Shop appliance parts online needed to repair your Air Conditioning / Water Heaters/ ranges / stoves/ ovens/ clothes washers / washing machines / clothes dryers / refrigerators / freezers / dishwashers/ microwaves and more
Great Service on brands like Whirlpool,GE, Sears Kenmore, Frigidaire, Sub Zero and many more brands.
Repairs Done Fast, Repairs Done Right. We Have the Parts, They Have the Know How!Just Need Parts? LG appliance service near jackson ms, Samsung service near jackson ms, Whirlpool service near jackson ms, GE appliance near jackson ms,Frigidaire service near jackson ms,
Jackson Appliance Repair Request for appliance service, air conditioning service, refrigerator repair service, freezer repair service, range or oven repair service, clothes washer or dryer repair service, dishwasher or disposal repair service or new installation service in and around Flowood,MS.| Ridgeland,MS. |Madison,MS. | Brandon,MS. | Pearl,MS. | Byram,MS. | Clinton, MS. | Jackson Air Conditioning repairs|
Call ACE Air & Appliance for repairs @ 601-573-6497
Call ABCO Air & Appliance for repairs @ 601-573-5853
Refrigerator Service Company in the Greater Jackson,MS. area.
Contact for a any refrigerator / freezer repair service.
ABCO AIR & APPLIANCE 601-573-5853
ACE AIR & APPLIANCE 601-573-6497
We have the parts, they have the know how!
Do It Yourself Refrigerator Freezer Repair Tips
Where is Refrigerator Condenser Fan Motor is Located in the refrigerator or freezer compressor compartment.The refrigerator condenser fan motor moves air across the condenser coil removing the heat that has been drawn from the evaporator coil inside the refrigerator or freezer compartment.Most commonly the condenser fan motor will be running when the compressor is running.
Where is Refrigerator Evaporator Fan Motor is Located in the freezer section and draws air across the evaporator coil to remove heat from the air. If the evaporator fan motor stops, the air stops moving across the evaporator coil causing the temperature to rise in that section. If you have a single evaporator coil, the whole cabinet area in both sections will begin to warm.
Refrigerator Evaporator Fan Motor Systems Evaluations: If hear a grinding noise now and then or what sounds like a bird chirping sound from the area where the evaporator fan motor is located you either have a defrost problem or a fan motor bearing seizing up on the evaporator fan motor. If when you remove the evaporator cover and find that the fan blade is hitting ice that has accumulated just around the evaporator fan motor, the door may have been left open, defrost the ice and reassemble. If the problem does not reappear no further action is required. However, when you remove the evaporator cover and find the entire evaporator encased in heavy frost, then you most likely have a defrost system error.
How To Diagnose a Fan Motor is Electrically Defective: If the bearings are not the problem you will need a multi-meter or a 2 point voltage tester. A service tech will first determine what voltage should be supplied to the fan motor.Normally the supply voltage is on a label on the fan motor itself. If not the wiring schematic may reveal the evaporator fan motor supply voltage. You should be able to verify the voltage with a multi-meter while the the unit is plugged in and the compressor is running. Normally it will be VAC or VDC. Newer units may use a three phase electric motor that a simple voltage tester will not be able to sufficiently test.
Refrigerator Freezer Temperature Control Thermostat Symptoms: Generally if the Refrigerator Temperature Control Thermostat is defective the refrigerator will either freeze everything or everywhere inside or nothing will run.(fan motors or compressor).If nothing is running you can unplug the refrigerator, unplug the thermostat wires from the thermostat. Check for continuity on the thermostat while it is turned to the high cool setting. No Continuity? Replace the thermostat. Reassemble.
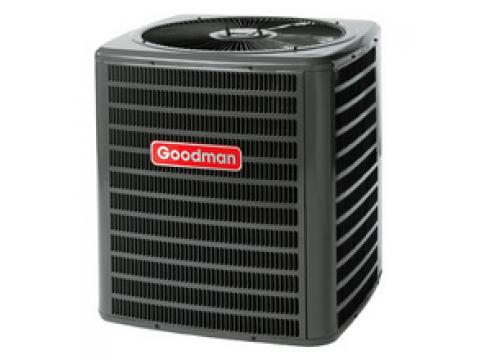
All Air Conditioning Service referrals for Jackson Ms. area. Repairs on Home Central Air Conditioning & Heating Units. Call a skilled air conditioning technician to come to your home to service and repair your home comfort system. Service in Jackson / Ridgeland / Madison / Resevoir / Clinton / Pearl / Brandon / Richland / Florence / Byram
On a Central Air Conditioning Unit : Common Questions
Is the wall thermostat set to Air Conditioning? Is the fan setting on Auto? If Yes
Is either of the units running? The inside unit (air handler) running? Is air coming out the vents? The outside unit (the condenser) running? Is it forcing air out the top?
If the air handler is not running. Is the Blower Cover in place depressing the cover safety switch?
When accessing the electrical compartment of the air handler: Does the air handler have an air handler control board with a LED that flashes to show what the error is? If so, count the number of flashes and compare that number with the legend on the wiring schematic.
If the air handler does not have an air handler control board: Find the fan relay, you will need a multimeter to find if the fan relay has 24 volts going to the fan relay coil, be sure the cover panel safety switch is depressed. 24 volts Y/N? If Yes is the fan motor relay supplying power to the air handler fan motor? If Yes the problem may be the air handler fan motor or the motor run capacitor.
If No If the energized fan motor relay is not supplying power to the air handler fan motor you may need to replace the fan motor relay.
If the inside air handler is running properly: Is the Condensing Unit Outside Running? Yes
If so, is the compressor running? If so, is the small copper tube leaving the outside condenser unit warmer that the larger copper tube? If the small tube is very hot then the condenser coils may need cleaning. Disconnect the power supply going to the outside condenser unit. Using a garden hose, with the power supply interrupted, spray water straight through the coil fins to clean the dust and dirt from them. Be sure to spray the water parallel to the fins so that they do not become bent or damaged. When finish wait 15-30 minutes then turn on the power supply to the outside condenser unit. After 15 minutes of running, is the inside air handler circulating cooler air than before? Normally a 15-20 degree temperature difference will be attained between the inside air handler intake and the inside air handler exhaust.
If the inside air handler is running properly: Is the Condensing Unit Outside Running? No
Disconnect the High Voltage Supply to the outside condensing unit. Remove the cover on the outside condensing unit electrical compartment.
Is the Power Contactor inside the outside condenser unit electrical compartment Energized? No
Is the Low Voltage Power Supply providing the minimum low voltage requirement to the Power Contactor? If Yes, you may need to replace the condensing unit power contactor. If the low voltage is not present? Then follow the low voltage wiring back to the low voltage transformer inside the air handler, checking for breaks in the wire. If the low voltage transformer has line voltage entering the low voltage transformer primary but no low voltage is coming out of the secondary transformer side: replace the low voltage transformer.
Is the minimum line voltage requirement coming through the Power Contactor? Yes
Is there the same voltage at the Power Contactor input as the output?
If Yes and neither the condensing fan motor or the compressor is running the problem may be in the condensing unit dual run capacitor.
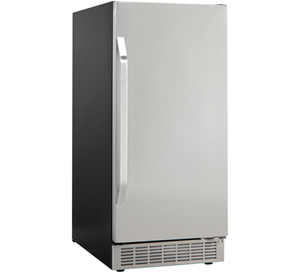
Ice_Machine_Repair in Mississippi In Home Service on Built In Ice Machine Brands KitchenAid, Whirlpool, GE, Monogram, Electrolux, Marvel, Scotsman, Sub Zero, Viking, Danby, Maxx Ice.
Refrigerator Ice Maker repair on All brands Whirlpool brands include KitchenAid, Maytag, Jenn Air, Admiral, Amana, Roper, Estate, Inglis, Ikea, Whirlpool.GE brands include GE, Hotpoint, RCA, General Electric, GE Monogram. Electrolux brands include Frigidaire, Gibson, White Westinghouse, Icon, Electrolux, Universal. Sears Kenmore, L-G, Samsung, Haier, Crosley.
1.In a Refrigerator it is very important to verify the freezer is below 15 degrees.
2.Is there ice in the ice maker mold?
3.If no look at the water inlet valve.
4.If Yes the problem is in the Ice maker.
5.If you need more help call us at 601-939-2550.
Nickel Safe Cleaners & Cleaning Services Available
Do It Yourself Built in Ice Machine Repair Help
Directions on Cleaning the Ice Machine Nickel Evaporator
You will need to use one 16-ounce (473 mL) bottle of approved ice maker cleaner. We recommend using the Affresh® Ice Machine Cleaner part number 4396808.
Turn off the ice maker.
Wait 5 to 10 minutes for the ice to fall into the storage bin. Remove all ice from the storage bin.
Unscrew the drain cap from the bottom of the water pan located inside the storage bin as shown. Allow the water to drain completely.
Replace the drain cap securely on the water pan. If the drain cap is loose, water will empty from the water pan and you will have either thin ice or no ice.
Read and follow all handling information on the cleaner bottle before completing the steps below. Use one 16-oz (473 mL) bottle of approved ice maker cleaner.
Pour one bottle of solution into the water pan. Fill the bottle twice with tap water and pour it into the water pan.
Press and hold the “Clean” button. (See the “Using the controls” section below.) The light will blink, indicating that the cleaning cycle is in process. When the indicator light turns green (approximately 70 minutes), the cleaning cycle is complete. During the cleaning cycle, the system will both clean and rinse itself.
After the cleaning cycle is complete, remove the drain cap from the water pan. Look to see if any cleaning solution is left in the water pan. If cleaning solution drains from the water pan, you should run the clean cycle again. Be sure to replace the drain cap securely on the water pan. Otherwise, if the drain cap is loose, water will empty from the water pan and you will have either thin ice or no ice at all.
NOTE: Severe scale buildup may require repeated cleanings with a fresh quantity of cleaning solution.
Press and hold the “On” button to resume ice production
Cleaning the Condenser
A dirty or clogged condenser:
Obstructs proper airflow.
Reduces ice-making capacity.
Causes higher-than-recommended operating temperatures which may lead to component failure.
Do It Yourselvers: DIY Bring Your Oven Heating Elements to us for testing.
We Test Oven Heating Elements, Surface Cooking Elements for free at our Service Center. We sell and repair oven Oven Control Boards, Control Panels, User Interface Membranes, Oven Thermostats, Oven sensors or probes, Oven Heating Elements, Oven Igniters, surface gas valves, infinite switches, Oven Safety Valves,surface heating elements, Bake elements, Broil elements and everything you need to complete your range or oven repair.
How To Replace Many Oven Elements:
Most Importantly Disconnect the Electrical Power to the Oven .
Use a flashlight if needed to see clearly the inside rear wall of the oven. Remove the oven racks. The old element is held in place by a 1/4″ sheet metal screw on each hinge plate on the element. Remove these 2 screws. Slowly pull the old heating element out of the oven, once you see the wires connected on each end of the element, pull the element a inch or 2 more. Slide the 1/4″ wire spade connector off each end of the old element, careful not to let the wire draw back into hole. Remove the old element from the oven.
Place the new oven element on the oven floor. Slide the 1/4″ wire connectors onto each end of the new oven element. Push the new element into the 2 holes the old element came out of. Install the 2 sheet metal screws you removed earlier. Reapply the electrical power .Turn the oven on and allow the new element to heat up . A small amount of smoke may come off the surface of the new element, this is common, not a indication of a problem. If the element becomes red hot, turn the oven off and reinstall the oven racks and feel the satisfaction of repairing your own oven.
Our Tips Are Meant As Universal Suggestions For the Mechanically and Electrically Inclined Individuals USE Them At Your Own Risk.
COMMON PARTS NEEDED TO REPAIR A STOVE RANGE OR OVEN
Oven Control Boards, Control Panels, User Interface Membranes, Oven Thermostats, Oven sensors or probes, Oven Heating Elements, Oven Igniters,surface gas valves, infinite switches, Oven Safety Valves, Bake elements, Broil elements and everything you need to complete your range or oven repair.
What Causes a Clothes Dryer to run more than one cycle for the clothes to dry?
If the Drum Seal Does Not Fill the gap between the drum and rear/front panel it may take 2 or 3 or 4 cycles for the clothes to get dry. Every gasket between the blower and the heating element intake is essential for the efficiency of the clothes dryer. Any vacuum loss by the door gasket, lint filter and housing gasket, the drum seals or any other gasket encapsulating the heat treated air on your dryer adds room air to the treated air used by the dryer; causing a loss of efficiency. These may also cause failure of the thermal fuse for the heating element or the dryer motor.
Any back pressure beyond the dryer blower in the dryer exhaust vent will also add to drying times.In most cases a 4 inch exhaust needs to be as straight and short as possible for ultimate dryer efficiency and shorter cycle time.
A clothes washer that does not extract the water from the clothes well, will also lengthen drying times.
Testing / Replacing Whirlpool manufactured Dryers with the rear mounted element.
The Heating Elements p/n 279838 and 4391960 are located behind the dryer drum. Unplug the dryer or disconnect the power. Remove the large rear panel. The heating element is on the right side, if you are behind the dryer looking at the back of the dryer, in a rectangular tube. with 2 large red wires connected to it at the bottom. Remove one of the wires, use a multi meter to test for continuity between the two element terminals or remove the element from the housing and visually inspect for breakage. If the bare high resistance wire inside the rectangular tube are not broken or touching the metal housing the element should produce heat if 250 volts a/c are applied to it during normal dryer operation.
How to remove GE part number WH43X24357 with images:
The 3 piece agitator has a hole under the bottom fin of the AUGER (p/n WH43X24358 ), you may need a mirror to find it. The lower inner sleeve of the AUGER has a hole in it.
You must rotate the UPPER AUGER to align the lower inner AUGER sleeve hole,
put a narrow screwdriver into the holes the force it through the the inner sleeve. Then hold the WASHPLATE (p/n WH43X24357) and rotate the AUGER CLOCKWISE @ to force the AUGER off the WASHPLATE.
Seen upside down with screwdriver forced through AUGER SLEEVE after release from WASHPLATE
After removal of the AUGER the 7/16 bolt in the middle of the WASHPLATE is accessible. Remove that bolt and lift the WASHPLATE up off the transmission shaft.
Every Home needs some maintenance from time to time.This will generally cause your home to operate efficeintly. To help remember to do this we can associate home maintenance with the season of the year.Lets start with spring.
Spring Time Appliance Needs Start in the Kitchen
Your refrigerator and air conditioning have need of attention before the temperature rises. Both appliances move heat from one location to another. It is vital that the appliance can release the heat in order to run at the lowest cost to you.You should vacuum or brush the dust off the condenser(the coils on the outside of the refrigerator) and make sure the fan moto…r near these coils is running while the refrigerator is running. The cardboard back is very important to your refrigerator,make sure it is attached and covers the compressor area.Your Air Conditioning unit works the same as the refrigerator,it moves the heat from inside the house to the outside.In order for it to operator at the lowest cost you should keep it clean .The Air Handler (the part that circulates the inside air) should have a air filter, that filter should be checked monthly during high usage months,if it is covered with dust the unit will run longer and cost more to use. Clean or replace your air filter regularly.
Spring Time Appliance Needs the Air Conditioning
The Condensing unit( the section outside that releases the heat )should be checked monthly in high usage months.The cooling fins on the coils should be kept straight and dust-free to release the heat that the coolant is carrying.The fins should be rinsed out with water using a garden hose the first days of usage every spring.Better late than never if you are just now thinking off it.There should be a electrical power disconnect on the wall closest to the condensing unit.Shut the power off before cleaning the fins with a hose.If you live generally dusty or in a high construction area or road construction area this may need to done more often
Fall Appliance Maintenance Needs :
Its a good idea to change your clothes washers water inlet hoses every 5 years.I have driven up driveways where water was still running down the driveway from a washer water hose that burst, one house had a sunken livingroom that was full of water from a broken washer hose. Often before a hose burst it will have a visible
bulge in it, I exhort everyone to inspect your water hoses for
this telltale sign.I’ll put our hoses on sale to make this job easier.
Calls us for your home maintenance needs at 601-939-3178
For Home Maintenance Service near Jackson Ms including near Madison,MS., near Ridgeland,MS.,near Brandon,MS., near Flowood,MS., near Pearl,MS., near Clinton,MS.,near Byram,MS., near Terry,MS., near Richland,MS., near Florence,MS.
Locally Owned and Managed here for 34 years
Help Replacing a Universal Fit Air Conditioning Condenser Fan Motor.
The Motor you choose should be the Same voltage, Same horsepower or greater, Same R.P.M.,Same rotation or bidirectional rotation, and the ability to be mounted the same way your original motor is,shaft up or shaft down,horizontal or vertical.
This illustration applies to the Fasco d7909, d7908, d7907 fan motors
In most cases you will by a motor that uses its own run capacitor,the motor will have 2 wires that go to that capacitor as shown here.
The motor will have 2 line voltage-in wires normally labeled L1 and L2. These wires will usually attach to the power contactor opposite the line voltage in from the power source as seen here.
If the motor is rotating the WRONG DIRECTION the you can REVERSE the rotation by changing the order of the Directional wires, the pictures show a motor with 4 wire,2 yellow joined together and 2 violet joined together, to reverse the rotation on this motor simply unplug the yellow and violet wires and join each yellow wire to a violet wire as shown.
If your original fan motor used a dual capacitor with the same capacitor rating as the replacement motor, you could use an alternate 3 wire connection as shown here